


Baby Dish Soap: Do You Need It? How to Choose and Use It
As parents, when you are washing a stack of baby bottles for the umpteenth time, you stop and wonder why they are still cloudy, smell slightly soapy, or feel greasy around the nipple.
Milk and formula leave residue in bottle nipples, valves, pump parts, and other small crevices. Those areas need attention when cleaning baby feeding items. The Centers for Disease Control and Prevention (CDC) recommends cleaning infant feeding items after every use.
When handwashing baby bottles, use hot water and soap, a dedicated basin, and a dedicated brush. Once you are done washing, rinse thoroughly and let everything air-dry completely. Keep reading to learn the best routine for using baby dish soap while cleaning.
Table of Contents
Quick Answer: Do You Need Special Baby Dish Soap?
No, you do not require a special baby dish soap to clean bottles and feeding equipment. You can use any liquid dish soap that is suitable for cleaning. The catch is in the technique: choose an appropriate dishwashing liquid, use it properly, and rinse feeding items such as baby bottles, pump parts, and other feeding equipment thoroughly.
Do not choose a baby dish soap simply because it says “baby” on the front. Instead, prioritize a fragrance-free formula, a clear ingredient list, good rinseability, and the ability to remove milk film.
Is Baby Dish Soap Necessary, or Can You Use Regular Dish Soap?
The term “baby dish soap” suggests that ordinary dish soap is automatically unsuitable for bottles, which is not true.
You can use any liquid dish soap that is suitable for cleaning. Just make sure that you follow the manufacturer’s instructions and rinse thoroughly. When shopping specifically for baby dish soap, look for a formula that:
- Cleans milk, formula, and food residue effectively
- Rinses away thoroughly
- Does not leave a noticeable fragrance or film
- Is suitable for the materials you are cleaning
- Has clear ingredient and usage information
- Is gentle enough for frequent handwashing
Your objective should be to remove residue without leaving unwanted soap residue, not to find the fanciest soap.
How Baby Dish Soap Differs From Regular Dish Soap

Baby feeding equipment requires more than a quick wash because of its cleaning profile and frequency of use.
Cleaning Profile
Baby bottles and breast pump parts have a very different cleaning profile from an ordinary dinner plate. Food residue on a plate can often be removed with a sponge and dish soap.
With a baby bottle, milk fat and protein can make their way into narrow spaces, nipples, valves, seals, and threads and settle there. A breast pump can have even more complicated parts, including membranes and small components designed to move milk through the system.
Frequency of Use
Baby bottles are washed several times a day. If residue remains in the bottle after one wash, it can accumulate with repeated use. This is why selecting a suitable baby dish soap has less to do with marketing and more to do with the practical chemistry of cleaning.
When a Baby-Specific Formula May Be Worth Choosing
Milk and formula can support microbial growth when left on surfaces for too long. That is why proper cleaning after feeding is important. A baby-specific formula may make sense if:
- You wash several bottles and pump parts every day.
- You dislike strong fragrances on feeding equipment.
- Regular soap leaves a noticeable smell or film.
- You want a pump or foaming dispenser for faster washing.
- You prefer a product specifically intended for bottles, nipples, and feeding accessories.
Note: A baby-specific formula is not a replacement for sanitizing or sterilizing. After washing the feeding equipment, complete any sanitizing step that is appropriate for your baby and equipment.
How to Choose a Baby-Safe Dishwashing Soap

Because baby feeding equipment comes into contact with breast milk, formula, water, or food, residue can remain in hard-to-reach areas such as bottle nipples, valves, and screw rings.
The FDA emphasizes thoroughly cleaning feeding equipment, including bottles and breast pump parts, to help prevent contamination. Residue that remains in a baby bottle can promote bacterial growth. Choose a baby-safe dishwashing soap with the following qualities:
1. A Low-Residue Surfactant System
Surfactants lift oils, fats, and other residues from a surface when they come into contact with water. When it comes to baby bottles, make sure the dish soap not only cleans thoroughly but also rinses away completely. A low-residue formula can help reduce concern about cleanser remaining on the equipment.
2. Fragrance-Free Formulation
Silicone components such as nipples, valves, and pacifiers can retain odors more readily than glass or some hard plastics. This is why parents may notice a strong smell even after rinsing. Washing feeding equipment with a fragrance-free or unscented formula eliminates this unnecessary variable.
3. No Added Dyes or Unnecessary Ingredients
A simpler formula without added dyes is often preferred when selecting a bottle cleanser, since dyes serve no practical cleaning purpose. The same principle applies to phosphates and other ingredients. Evaluate what each ingredient contributes to the formula rather than assuming that a “natural” or “chemical-free” label automatically means better.
4. Comfortable for Repeated Handwashing
During the early months, parents may wash bottles multiple times a day, so hand comfort matters. A good cleanser should not leave your hands excessively dry or uncomfortable, which can make a repetitive task more unpleasant.
5. Effective on Milk and Food Residue
Baby dish soap needs to work well in addition to being gentle. The formula should be capable of breaking down milk fat, milk proteins, formula residue, baby food, purees, and grease from family meals. If your cleanser requires excessive scrubbing every time, it may not be a practical option for a household washing multiple feeding items each day.
How to Wash Baby Bottles, Nipples, and Pump Parts

Each part of the feeding equipment requires a slightly different washing technique. The basic principle is simple: disassemble the equipment, clean every surface that comes into contact with milk, rinse thoroughly, and allow everything to dry completely.
Step 1: Disassemble Every Milk-Contact Part
Separate every removable component to ensure proper cleaning underneath rings, inside valves, around seals, and inside nipple openings. Pump parts need the same attention. Follow the breast pump manufacturer’s instructions, because components such as tubing and electrical parts have specific cleaning requirements.
Step 2: Rinse Away Milk Residue Before Washing
Rinse components soon after feeding. Removing milk before it dries makes the cleaning process easier. Rinse each part under running water before adding soap to remove loose milk and formula.
Step 3: Wash in Warm, Properly Dosed Soapy Water
Use a designated washing area to wash the bottle components with dish soap, following the product’s instructions. More soap does not mean cleaner bottles; it only makes rinsing more difficult. Use a bottle brush to scrub the inside of the bottle and a smaller brush for hard-to-reach areas such as nipples and valves.
Step 4: Scrub Nipples, Valves, Seals, and Narrow Openings
These are the parts most likely to be overlooked, so pay particular attention to nipple openings, valve openings, bottle threads, silicone seals, pump membranes, and narrow tubes or connectors designed for washing.
Pro tip: Squeeze water through the nipple holes while washing to ensure the openings are cleaned properly.
Step 5: Rinse, Inspect, and Rewash if Necessary
Rinse every part under clean running water until you can no longer see soap or milk residue. Then inspect each piece. If a bottle still looks greasy or cloudy or smells strongly of soap, wash and rinse it again rather than assuming that more detergent will solve the problem.
Step 6: Air-Dry on a Clean Surface
Place the clean components on a clean drying surface and allow them to air-dry. Wiping the inside of bottles or components with a used kitchen towel can reintroduce contaminants.

Step 7: Sanitize as Appropriate
Cleaning and sanitizing are not the same thing. The CDC recommends daily sanitizing for extra germ removal when a baby is younger than 2 months, was born prematurely, or has a weakened immune system.
For older babies, consider your baby’s age, health circumstances, and the manufacturer’s instructions. If sanitizing is called for, complete that step after cleaning.
Hand Washing vs. Dishwasher: Which Method Fits Your Gear?
There is no single winner for every family. Both methods can work when bottles and their components are dishwasher-safe and the manufacturer’s instructions are followed.
| Cleaning Method | Advantages | Disadvantages | Best For |
|---|---|---|---|
| Hand Washing |
|
|
Bottles with complex parts, valves, nipples, and components that need individual attention. |
| Dishwasher |
|
|
Dishwasher-safe bottles and components when families need to clean multiple items at once. |
Best practice: Follow the bottle manufacturer’s dishwasher directions. If the equipment is dishwasher-safe, place the parts as instructed, securely in the recommended rack or basket, and keep small parts together.
Reminder: A dishwasher’s standard cycle should not automatically be considered equivalent to sanitization. Follow current health guidance and the manufacturer’s instructions.
Modern Solution: Automated Bottle Washing
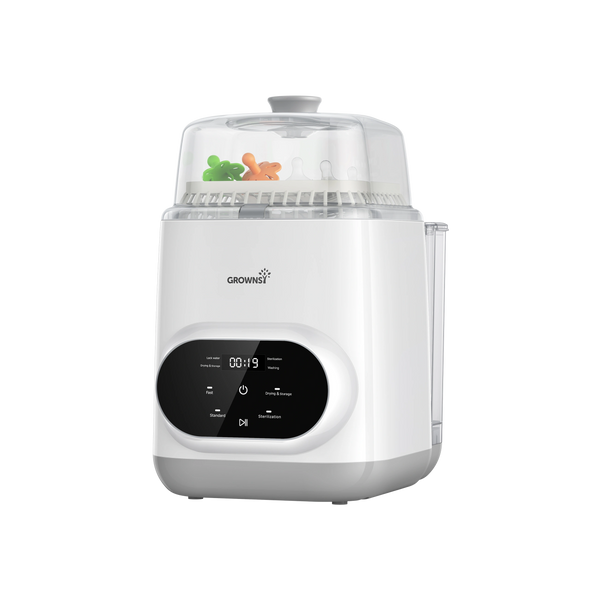
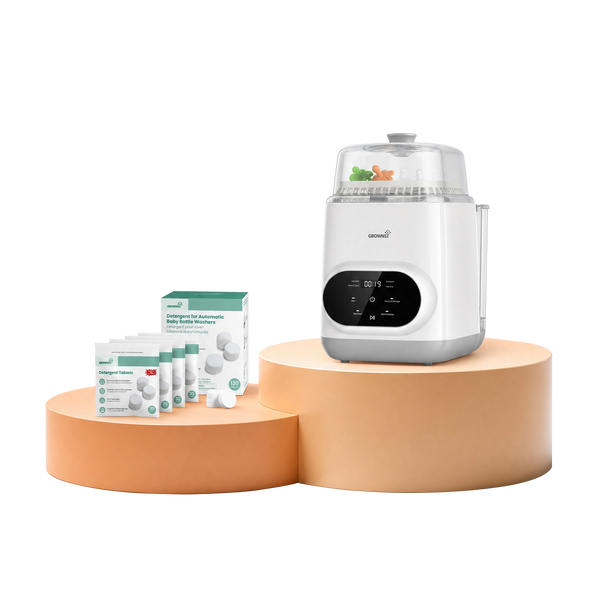
During the first few months of a baby’s life, bottles and pump parts may need to be cleaned multiple times each day. A dedicated bottle washer, such as the Grownsy 4-in-1 EaseClean Feeding Bottle Washer Pro, can automate much of the process. It combines washing, steam sanitizing, drying, and storage.
Handwashing may be entirely practical if you clean only one or two bottles now and then. However, when families manage several bottles and pump parts each day, automation can remove a repetitive task from their routine.
Why Bottles Still Look Cloudy or Smell Soapy
A cloudy bottle does not automatically mean that something is wrong with your soap. Several things can cause a bottle to look or smell unusual:
- Milk film often feels greasy and may appear as a hazy coating around bottle walls, threads, or silicone components.
- Soap residue may leave a slippery feeling or noticeable lingering scent after rinsing.
- Hard-water deposits often appear as white or chalky spots rather than a greasy film.
- Scratches, mineral deposits, or material wear can also cause cloudiness.
Disassemble the cloudy component completely and inspect it under good lighting. If a component is damaged, cracked, sticky, or deteriorating, arrange for a replacement. MedlinePlus also recommends replacing cracked or torn nipples because damaged pieces can break apart and create a choking hazard.
Cleaning, Sanitizing, Drying, and Storing Feeding Gear

A clean bottle is only useful if it stays clean until the next feeding.
Cleaning
Cleaning removes milk, food, grease, and other visible or microscopic residue from a surface using soap or detergent and water. This is the basic step that should happen after feeding equipment is used.
Sanitizing
Sanitizing reduces the number of microorganisms on a surface to a level considered safe by the relevant standard or method. This may be done with a dishwasher’s sanitizing cycle or another approved method.
Sterilizing
Sterilization is a more intensive process that eliminates all forms of microbial life to a specified level. Methods may include steam or boiling, depending on the equipment and manufacturer’s instructions.
Note: Always follow guidance from your pediatrician and the bottle or pump manufacturer, particularly for newborns, premature babies, or babies with specific health considerations.
Store Feeding Parts Safely
Let every piece dry completely before reassembling the bottle. If you use a dedicated drying rack for infant feeding equipment, clean it regularly so moisture does not remain trapped around bottle parts.
Pump, Foam, Concentrate, or Refill: Which Format Is Practical?
The best format is often the one that makes you more likely to wash feeding equipment correctly every time.
Pump and Foaming Baby Dish Soap
A pump is convenient when you are standing at the sink with a pile of tiny bottle parts. Foaming formulas can be practical for parents who wash several bottles a day because the soap spreads easily across brushes and feeding components.
Concentrates and Refill Packs
Concentrates and refill packs can make sense if you go through soap quickly. Compare the amount of usable product, not just the bottle size, before buying. A larger container is not automatically better.
Travel-Size Baby Dish Soap and TSA Liquid Limits
While traveling, a small bottle of liquid dish soap is easier to carry. Under the TSA’s standard 3-1-1 rule, liquid containers carried through a U.S. airport security checkpoint in a carry-on must generally be 3.4 ounces (100 mL) or less and fit within the required quart-size bag.
TSA rules for breast milk, formula, and other medically necessary liquids are different, so do not assume the same exception applies to dish soap. Check current TSA guidance before traveling.
Conclusion
Select a baby dish soap that does not overwhelm your routine as a parent. Choose one that can effectively handle bottles, pump parts, baby dishes, and the family’s everyday kitchenware.
The goal is to make the daily cleaning routine better suited to the items your baby uses most. A fragrance-free, low-residue formulation can reduce unnecessary odors and residue.
The best baby dish soap is ultimately the one that cleans thoroughly, rinses cleanly, works for the materials you use, and is practical enough that you will use it correctly every time. Consider an automated bottle washer if you find yourself washing a stack of baby bottles every day.
Medical and Safety Disclaimer
This article is for general informational purposes and is not a substitute for advice from your baby’s pediatrician or another qualified healthcare professional. Always follow the cleaning, sanitizing, and replacement instructions provided by the manufacturer of your bottles, nipples, breast pump, and other feeding equipment. If your baby is premature, younger than 2 months, or has a weakened immune system, ask your pediatrician about the appropriate routine for cleaning and sanitizing feeding equipment.
Reference List
- Centers for Disease Control and Prevention (CDC). How to Clean, Sanitize, and Store Infant Feeding Items. Updated March 19, 2025. CDC source
- U.S. Food and Drug Administration (FDA). Handling Infant Formula Safely: What You Need to Know. FDA source
- MedlinePlus. Buying and Caring for Baby Bottles and Nipples. MedlinePlus source
- Transportation Security Administration (TSA). TSA Travel Tips / 3-1-1 Liquids Rule. TSA source
- Grownsy. How to Clean Baby Bottles: Bottle Washer, Dishwasher, or Hand Wash? Grownsy cleaning guide


